Mastering Surface Preparation: How to Achieve a Flawless Finish with Carbide Burrs
Rushing through surface preparation often leads to a finish full of flaws that no amount of polishing or painting can fix. You know those tiny burrs and scratches that seem harmless? They sabotage your work’s final look and durability every time. Using carbide burrs the right way lets you remove surface imperfections and build a smooth base that makes your coatings and paint stick perfectly, giving your craftsmanship tools the results they deserve. For expert tips on using carbide burrs, check out this guide.
Check out our entire selection of USA made Carbide Burr tools here
Importance of Surface Preparation
Creating a flawless finish starts long before the final coat of paint or polish. The magic lies in surface preparation. Without a smooth base, your efforts might fall short of expectations.
Achieving a Professional Finish
The path to a professional finish begins with addressing surface flaws. Removing surface imperfections is crucial. These tiny defects can ruin the appearance and longevity of the finished product. By using tools like carbide burrs, you can eliminate these issues efficiently. These burrs make it easier for coatings to adhere, setting the stage for a stunning result.
You might think a few scratches won’t matter, but they can be your project’s downfall. Overlooking these details can compromise the final look. Ensure every corner is free of defects.
Enhancing Aesthetic and Durability
Aesthetics and durability go hand in hand. Proper preparation not only makes your work visually appealing but also extends its life. It strengthens the material’s resilience against wear and tear. A well-prepared surface holds paint and coatings better. This results in a longer-lasting and more beautiful finish.
Most people focus solely on the final coat, but the base layer is key. A solid foundation is the secret ingredient for both beauty and strength.
Understanding Carbide Burrs
The right tools can make all the difference in surface preparation. Carbide burrs are essential for achieving smooth, flawless results. Let’s explore how these tools can transform your work.
Types and Uses
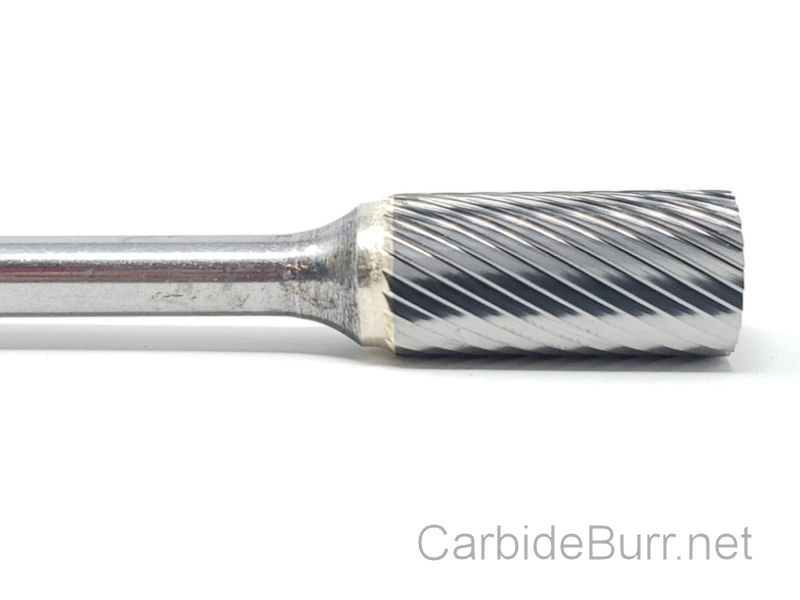
Carbide burrs come in various shapes and sizes, each serving a unique purpose. For instance, cylindrical burrs are perfect for flat surfaces, while pointed ones excel in tight corners. Understanding the right tool for the job is crucial for success.
A beginner’s guide to these tools can be found here.
Most artisans use these burrs for material removal, but their potential doesn’t stop there. They can also shape, cut, and engrave a variety of materials. By selecting the appropriate burr, you can elevate your craftsmanship to professional levels.
Selecting the Right Burr
Choosing the correct burr is a critical step. Consider the material you’re working with and the desired outcome. Different materials require different burrs for optimal results.
-
Cylindrical: Ideal for flat surfaces
-
Ball-shaped: Perfect for detailing and intricate work
-
Inverted cone: Great for undercutting
Selecting the wrong tool can lead to unnecessary work and subpar results. Take the time to understand the options and make informed choices. This guide on burr cutting offers more insight.
Techniques for Flawless Preparation
To achieve a perfect surface, you need the right techniques. These methods ensure that you lay a solid foundation for finishing coats.
Removing Surface Imperfections
Think of surface imperfections as hurdles to overcome. Carbide burrs are your allies in this battle. By carefully guiding the burr, you can erase burrs, scratches, and other flaws.
It’s not just about removing material; it’s about doing so with precision. This attention to detail results in a base that enhances the final finish. By focusing on this step, you ensure the next layers shine.
Effective Polishing Techniques
Polishing is where your work gets its shine. It transforms a rough surface into a smooth canvas. But polishing isn’t just about making things look pretty; it prepares the surface for coatings and finishes.
An effective technique involves using the right tools and applying consistent pressure. This method not only polishes but also strengthens the surface. For more tips, check out this polishing guide.
Application of Finishing Coats
With a perfectly prepared surface, the next step is applying finishing coats. This process enhances the work’s appeal and longevity.
Coating Application Tips
Applying coatings may seem straightforward, but there’s an art to it. You must ensure even coverage and proper adhesion. This step determines how well the finish holds up over time.
To achieve the best results, start with a thin layer and build up gradually. This prevents drips and ensures a smooth finish. Remember, patience is key in this process.
Painting Tips for Smooth Results
Painting is the final step in the transformation. To achieve a smooth, professional look, follow these tips:
-
Use quality brushes for even application
-
Apply thin layers to avoid runs
-
Allow drying time between coats
These techniques not only enhance the visual appeal but also increase durability. By taking your time, you’ll achieve the results you desire.
Tools for the Trade
Craftsmanship tools are your partners in achieving excellence. Understanding and maintaining them is essential for consistent results.
Essential Craftsmanship Tools
Your toolkit should include more than just carbide burrs. Essential tools for surface preparation and finishing include:
-
Sanding blocks: For smoothing surfaces
-
Polishers: To add shine
-
Brushes: For applying coatings
These tools help you achieve a fine finish and enhance your work’s aesthetic. Investing in quality tools is an investment in your craft.
Maintaining Finish Quality
Once you’ve achieved a flawless finish, your job isn’t over. Maintaining this quality requires regular care and attention. This includes cleaning and storing tools properly.
A well-maintained tool kit ensures that you’re always ready for your next project. This proactive approach saves time and enhances the quality of your work.
By following these steps and using the right tools, you can master the art of surface preparation. The result: a stunning, flawless finish that showcases your craftsmanship.
Follow Us On Social Media for Special Coupons
Facebook – Twitter – Instagram – Youtube
Carbide Burrs on 1/4″ Shanks – Solid Carbide Burrs – 1/4″ Carbide Burrs on 1/8″ Shanks – Long Shank Carbide Burrs – NF Carbide Burrs – Carbide Burr Sets – End Mills – Accessories
Order Tracking – Dropship Carbide Burr Tools – Contact Us – Cut Options – Coupon Codes – Posts
(513) 899-2610
PO Box 197 – Morrow Ohio 45152
Check out our entire selection of USA made Carbide Burr tools here